Standard Emissions at Checkout
This is a walkthrough for integrating what we called the Climes Vote Flow.
Our estimate for the complete integration is around 8-10 Hours of Engineering and Design bandwidth including time for testing
Integration Steps
There are 4 steps to integrate the Climes Vote Flow into your product.
- Get your billing setup
- Reach out to our api team and get an account setup
- Add your billing details
- Get your API keys for
stagingandproductionfrom the API key page
- Cart Management
- We provide simple endpoints through which you can set and get the opt in status of the cart
- Order Management
- These endpoints are used to manage the status of a
climesorder while checking out and post-checkout. - It allows you to modify/cancel an order for climes in case an order gets cancelled on your end
- These endpoints are used to manage the status of a
- Post Order Experience
- These endpoints allow you to customize the post order experience to your liking
- You can either use our default post-order voting experience or build it into your interface using our simple APIs
Cart Management
The following API flow is needed pre checkout
Preview
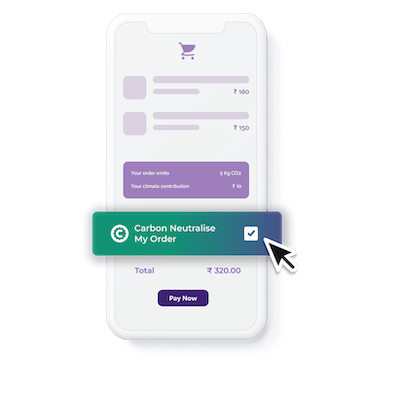
Show a widget similar to the one below to allow the user to Opt-In to climate action

Our recommended placement is on the checkout and cart pages just before Total Amount

Checkbox Interaction and State
The state of the checkbox can be managed by
Checking whether the current
cart_idis opted in or not by using our Get OptIn API
When the Get OptIn API endpoint is called, it sends back a response in this format{
"optedIn": true
}Where the value of
optedInindicates whether for thiscart_id, the box should be checked or not.On interaction with the checkbox setting the opted in status to true or false by using our Set OptIn API
When the user checks the box set the
optedInvalue to true and on unchecking set theoptedInvalue to false
This allows you to track the state of opt-in for the currentcart_idanywhere you wantIf you'd like to show the current opt-in anywhere else as well you can fetch it using Get OptIn API
If you use the same id for Cart and Order Management - you can pass the Order II as the value for cart_id.
Order Management
In your order placement flow, add the following steps right at the end
- Check if the the
cart_idthat corresponds to this order has opted in for climes by making a request to Get OptIn API endpoint - If it returns
optedIn:truethen create a new order using our Create Order API along with the samecart_idthat was used for the OptIn - When we receive the order, we’ll assign the pre-calculated no of climes to this order and the user will be able to access these climes
- One caveat, to allow for a cancellation period we allow you to set an
unlock_datefor this order upto which even if the user chooses to vote with these climes the climes can be cancelled unlock_dateis set as 10 days as default from date we receive the order
- One caveat, to allow for a cancellation period we allow you to set an
- In the event of a cancellation you can use Order Cancel API
- Orders cannot be cancelled once the
unlock_datedate has passed
- Orders cannot be cancelled once the
Post Order Experience
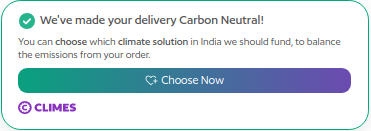
After the order is successfully created you can display a success card at the success page

This success card will have a Choose Now button
The link for the Choose Now button can be fetched using the Get Voting Link endpoint
It should have a format similar to this :
https://climes.io/app/brands/YOUR_SLUG/vote?o=PARTNER_ORDER_ID
Where YOUR_SLUG is the slug for your brand on the Brands Directory
Using this link your users can vote using the map interface.
If you'd like to offer a more customized experience you may refer to the User Experience APIs
With that the integration is complete